


Before soil, concrete, or other work covers the plumbing, use a pool plumbing inspection checklist to create a clear record of what was installed. You do not need to cut, move, loosen, or test pool components yourself. The goal is simple: document visible information, compare it with the approved plans, and request records from the project team.
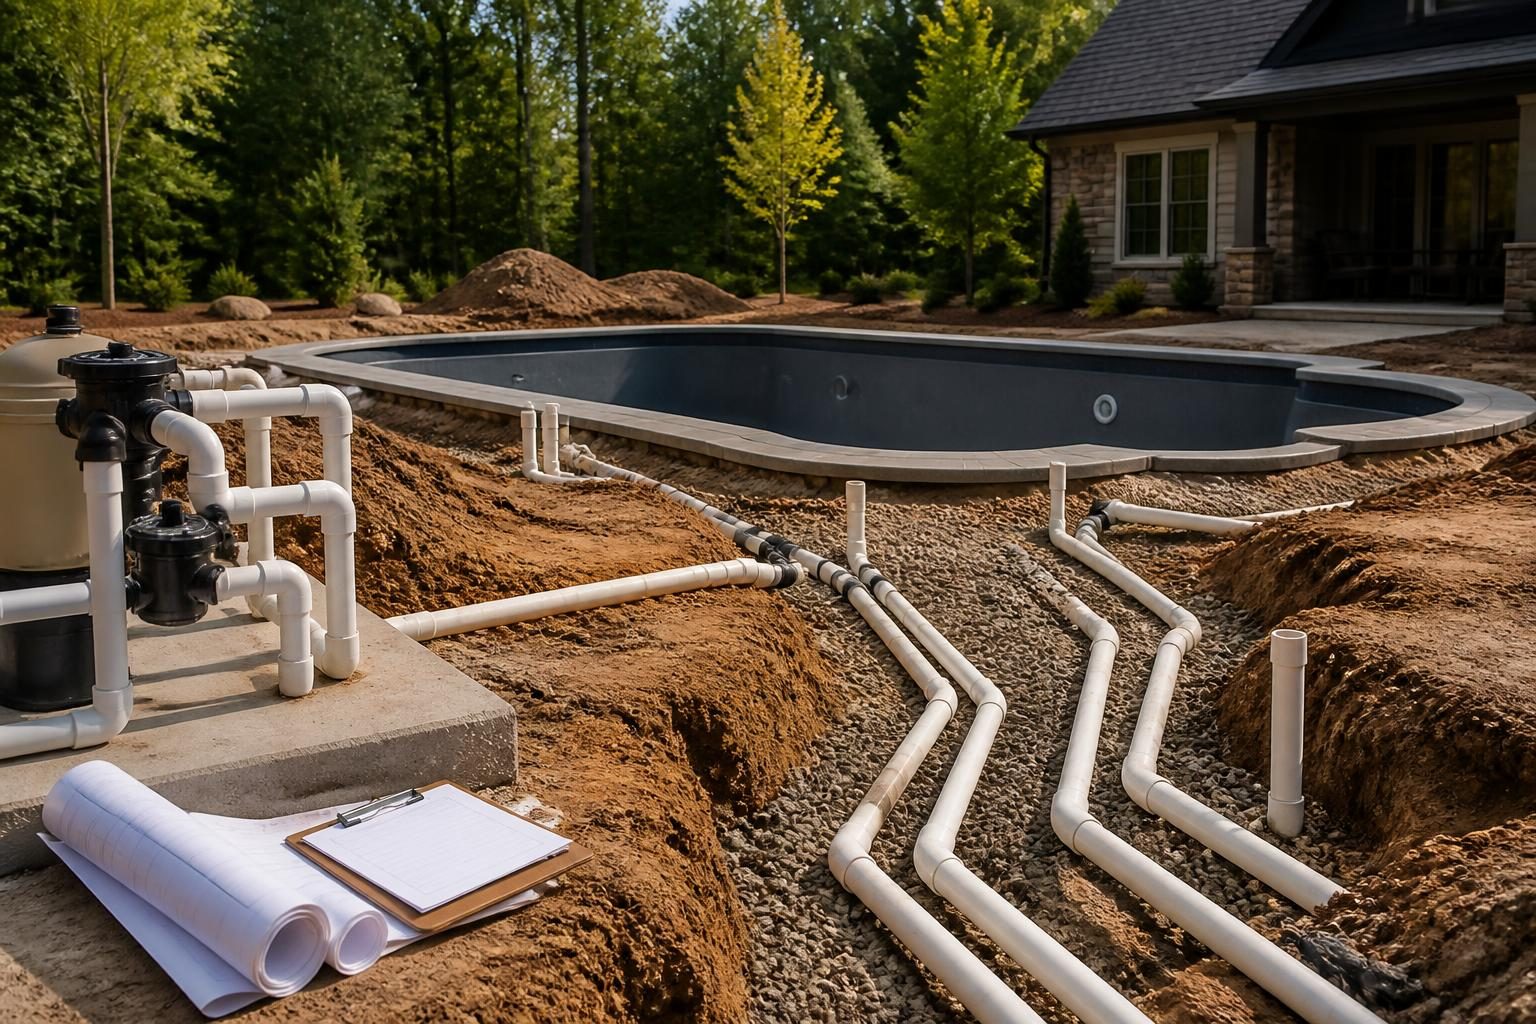
Pool plumbing can become difficult to trace after backfill or deck installation. A few organized photos and documents may help future service professionals understand the system. They can also help you identify questions while the installation remains visible. This guide focuses on non-invasive observation, not approval of the work.
Start with the approved pool plumbing plan
Ask for the latest plan set before reviewing the installed pipes. The plan may show the pool shape, equipment pad, drains, returns, skimmers, water features, valves, and pipe routes. It may also show revisions that replaced an earlier design.
Use the current version for your comparison. A drawing with an old date or superseded revision may not describe the installation now in progress. Ask the contractor to identify the approved plan by date, revision number, or another clear reference. Add that information to your pool plumbing inspection checklist.
- Save the approved plan as a PDF and keep a paper copy.
- Record the plan date and revision on your project log.
- Mark features that are installed and those still pending.
- Ask which changes require a revised drawing or written approval.
- Keep written responses with the plan instead of relying on memory.
Do not assume that a visual difference proves an error. Field conditions, equipment selections, or approved changes may affect routing. Ask for an explanation and compare the answer with the contract, change documentation, and current plans. The North Carolina pool builder contract checklist can help you organize those project records.
Pool plumbing inspection checklist for labels and routing
Walk the site only where the project team says it is safe. Stay outside excavations, avoid unstable soil, and do not step on pipes. Take photos from several angles while the lines remain exposed. A pool plumbing inspection checklist works best when each photo has a date and location.
Record each visible line
- Photograph pipe labels, size markings, and any color coding.
- Note where each line appears to start and end.
- Photograph pipe groups near the pool wall, equipment pad, and water features.
- Capture wide images that show location, then close images that show details.
- Place a temporary written reference card in the photo when appropriate. Keep it clear of the work.
- Record the date, project stage, and camera direction in your notes.
A photo of one pipe alone may not explain its location later. Include fixed references such as the house wall, pool edge, equipment pad, or a measured site feature. Do not alter pipes or place objects in a trench without permission.
Document the route without opening anything
Ask the contractor to identify the intended route for suction lines, return lines, cleaner lines, water-feature lines, and any lines serving future equipment. “Suction” describes water moving toward the pump. “Return” describes water moving back to the pool.
Sketch the route on a copy of the plan or use numbered photo references. The sketch does not replace an as-built drawing, survey, or professional record. It gives you a useful index for the photographs.
- Use one number for each line or line group.
- Match that number to the plan and photo filenames.
- Record visible crossings, sleeves, bends, and entry points.
- Note areas where the route cannot be seen clearly.
- Ask whether the contractor will provide an as-built diagram after installation.
Review drains, skimmers, returns, and special features
Pool circulation includes several connection points. A skimmer collects surface water. Drains or suction outlets draw water from the pool. Returns send treated water back into the pool. Water features may use separate lines or valves.
Use the approved plan to identify each point. Photograph the visible connection, the surrounding structure, and the pipe route before covering. Do not remove covers, fittings, grates, or protective materials.
- Confirm that each planned skimmer location appears in the record.
- Photograph drain or suction-outlet locations from a safe distance.
- Record each return fitting and its apparent position.
- Identify lines for waterfalls, bubblers, spas, cleaners, or other features.
- Ask how unused or future lines are capped and documented.
- Keep manufacturer information for visible fittings and outlet components.
Drain and suction-outlet details can involve safety and code questions. A homeowner photo review cannot determine whether an installation meets current requirements. For North Carolina documents and interpretations, consult the North Carolina Office of State Fire Marshal, then confirm current local requirements with the inspections department.
For broader safety planning, the U.S. Consumer Product Safety Commission’s Pool Safely guidance discusses layers of protection around residential pools. It does not replace local requirements or a professional plumbing review.
Request valve and equipment-pad documentation
Valves control where water travels. Several valves may sit close together at the equipment pad, which can make future troubleshooting harder if no one identifies them. Photograph the valve arrangement before insulation, enclosure work, or other obstructions limit access.
- Take a wide photo of the entire equipment pad.
- Take close photos of each valve handle, label, and connection.
- Ask for a written description of each valve’s normal position.
- Record which valve serves the pump, filter, heater, cleaner, spa, or water feature.
- Note whether labels are temporary or intended to remain permanently.
- Ask for the equipment schedule and plumbing schematic.
Do not turn valves to “see what happens.” An incorrect position may affect circulation or equipment operation. Ask the contractor or service professional to demonstrate the system after commissioning, when the equipment is ready for operation.
Equipment planning often affects pipe routes and service access. If automation or a variable-speed pump is part of the project, keep those equipment documents with the plumbing record. Internal guides on pool automation planning and pump selection questions may help you organize related information.
Collect pressure-test records before covering
A pressure test checks whether a plumbing section holds pressure under stated test conditions. The test record should identify what the contractor tested and who performed the test. A homeowner should not pressurize, release, cap, or modify the system.
Ask for the record before backfill or concrete covers the lines. If no record exists, ask what testing the team completed and when it will provide supporting documentation. Add the answer to your pool plumbing inspection checklist.
- Request the test date and the person or company responsible for the test.
- Ask which plumbing sections the test included.
- Record the test medium, pressure, duration, and gauge information if supplied.
- Ask whether anyone excluded, repaired, or retested a section.
- Keep copies of signed forms, photographs, and written explanations.
- Ask how the test record connects to the current plan revision.
Do not treat a pressure-test record as proof that the entire pool system complies with every applicable requirement. Testing scope and local inspection procedures vary. The project contractor and appropriate qualified professionals should explain what the record covers.
Create a final photo and document package
Organize the material before the site changes. A consistent file system makes the record useful months or years later.
Suggested folder structure
- 01 Approved plans: current drawings, revisions, and written approvals.
- 02 Pipe routing: wide and close photographs with dates.
- 03 Fixtures: drains, skimmers, returns, lights, and water features.
- 04 Equipment pad: valves, labels, fittings, and equipment connections.
- 05 Testing: pressure-test records and related communications.
- 06 Changes: change orders, sketches, and explanations.
Use descriptive filenames rather than generic camera numbers. Include the date, feature, and location. Back up the package in a second location. If you later hire a service professional, provide the plan and photo index together.
Keep a short open-question list. Include missing labels, unclear routes, absent test records, plan differences, and inaccessible connections. Send questions in writing and save responses with the project file. You can also review practical pool documentation methods for ideas about consistent records.
Know when a professional review is needed
A non-invasive checklist is a documentation tool, not a substitute for inspection or design review. Contact the local inspections department when you need to verify permits, required inspections, or current local interpretations. Ask the licensed pool contractor to explain the plumbing layout and provide project records.
For questions involving electrical components, use a licensed electrician. For structural or site concerns, consult the appropriate engineer or surveyor. If plumbing routes may affect septic components, drainage, or other regulated features, involve the relevant local authority or qualified specialist before work continues.
Build a Pool in North Carolina encourages homeowners to preserve clear records while the work remains visible. A calm review of plans, labels, photos, valves, and test documents can make future maintenance conversations more precise without requiring you to disturb the installation.
Comments are closed