


A pool plumbing layout planning guide helps you look beyond the visible pool shell. Pipe routing, valves, returns, suction points, cleanouts, and equipment placement all affect how water moves and how easily a technician can find a problem later.
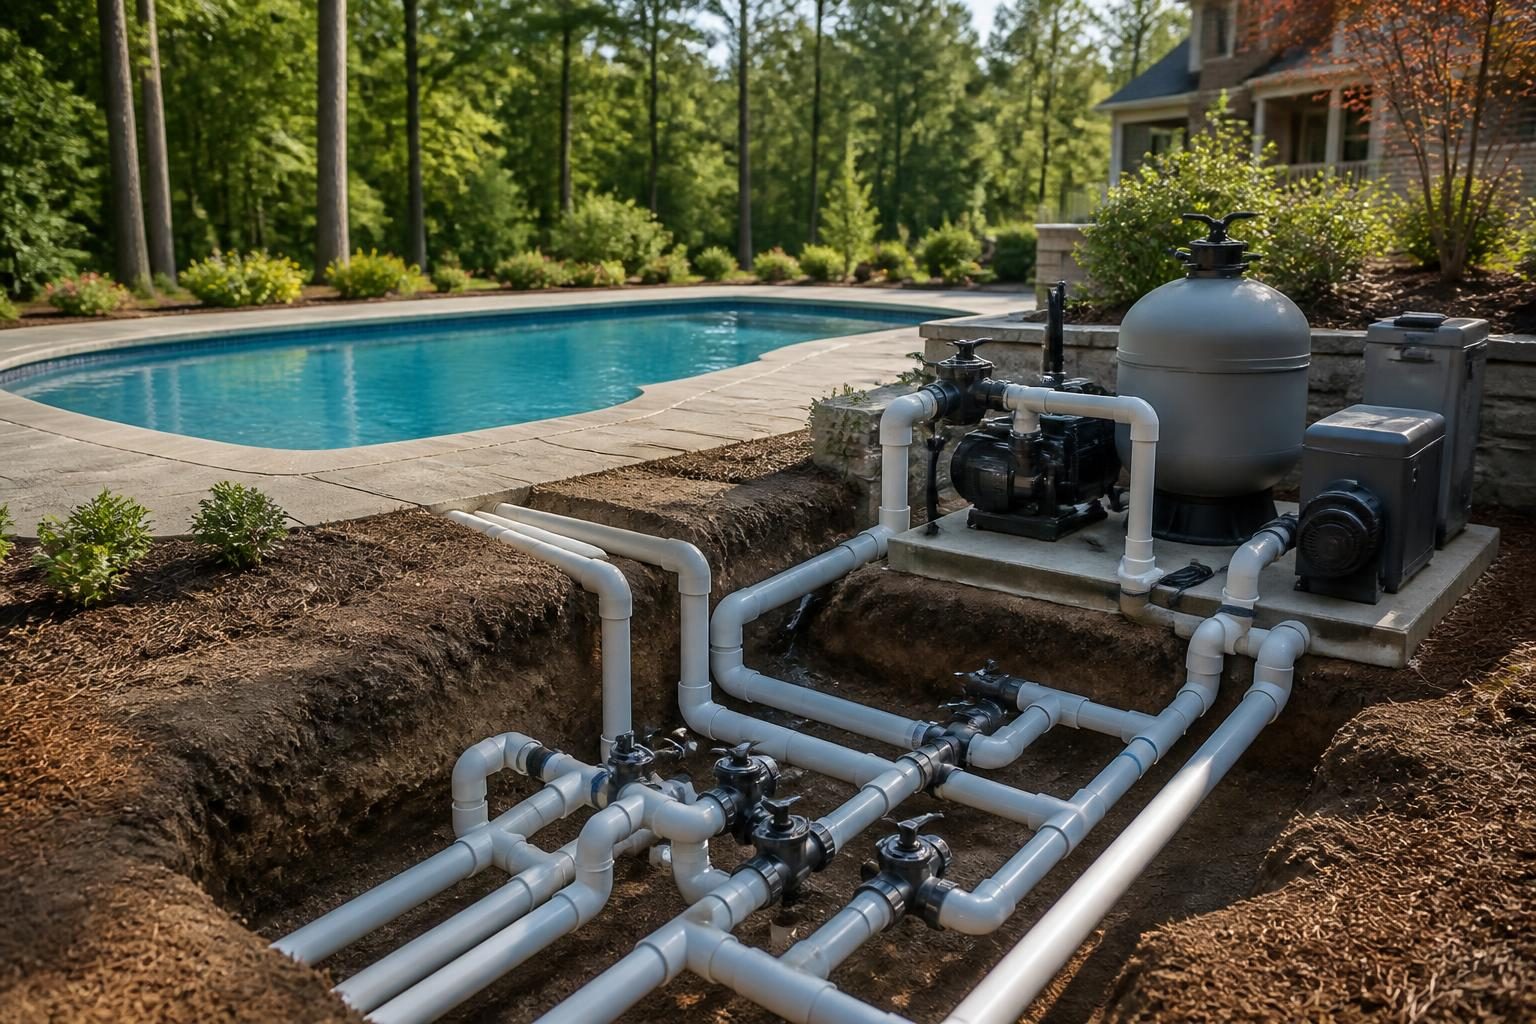
Most crews cover plumbing before they finish the deck and soil. That makes early review important. A neat equipment pad cannot correct every routing decision beneath the yard. Before approving a plan, ask how each line serves the pool, where you can isolate it, and how future service will occur.
North Carolina projects vary by property conditions, jurisdiction, adopted requirements, utility locations, septic systems, slopes, and project scope. Treat this article as a homeowner planning resource. Ask the appropriate local authority and qualified professionals to confirm current requirements.
Why the plumbing layout deserves early attention
Pool circulation moves water from the pool to the pump and filter, through treatment equipment, and back through return outlets. The goal involves more than moving water. The system should distribute treated water throughout the pool while allowing equipment to operate and receive service.
Routing choices can affect several everyday tasks:
- Locating a suspected restriction or leak.
- Cleaning or replacing filters.
- Closing one line while another remains available.
- Balancing flow between different pool areas.
- Protecting pipes from avoidable damage during later work.
- Understanding the system after the original crew has left.
Pipe length, bends, elevation changes, pipe size, fittings, and equipment specifications all influence hydraulic performance. “Hydraulics” means how water flows through the system. A licensed pool professional should evaluate the design rather than relying on appearance alone.
For related planning, review equipment pad access and service clearance. The pad and underground plumbing should be considered together.
Review pipe routing before the ground is covered
A useful pool plumbing layout planning guide starts with a drawing that shows more than the pool outline. Request a plumbing plan or marked-up construction drawing that identifies each major line, its destination, and its relationship to the equipment.
Look for clear labels for skimmers, drains, water features, cleaners, returns, pump suction, filter discharge, heater connections, and any future connection points. Not every pool includes every component. The important point is that the installed system should remain understandable.
Questions about routing
- Which lines run from the pool to the equipment area?
- Where do routes cross walls, footings, decks, planting areas, or drainage features?
- Can a future repair reach the line without removing major improvements?
- Are pipes protected where later fence, patio, irrigation, or landscaping work may occur?
- Does the plan show changes from the latest approved design?
Shorter and more direct routes may reduce unnecessary resistance, but the best route also considers access, grade, structural work, and site constraints. Do not ask a contractor to change routing based only on a general rule. Have the responsible pool professional confirm the design.
Take dated photographs before backfilling or placing concrete. Include wide views that show property landmarks and close views that show pipe labels, fittings, sleeves, and penetrations. Keep the plan and photographs with your project records.
Returns and suction points shape circulation
Returns send filtered or treated water back into the pool. Their location, direction, and adjustment can influence surface movement, dead spots, debris collection, and how evenly water reaches different areas.
Suction points draw water toward the circulation system. These may include skimmers, floor drains, vacuum connections, or other designed inlets. Their arrangement should match the pool’s shape, depth changes, steps, tanning ledges, and water features.
A practical pool plumbing layout planning guide should prompt questions about the whole circulation pattern, not just individual fittings:
- Will returns help move water across shallow areas and deeper sections?
- Could steps, benches, walls, or features interrupt circulation?
- Can the operator identify which valve controls each suction or return group?
- Are specialty features separated from ordinary pool circulation when needed?
- Does the equipment design account for the number and type of outlets?
More outlets do not automatically guarantee better performance. Flow depends on the complete system, including the pump, filter, pipework, fittings, and operating settings. A pool professional should confirm whether the proposed arrangement suits the equipment and intended use.
Water care still matters after construction. For general residential testing and treatment information, consult the CDC guidance on home pool water treatment and testing.
Make valves and cleanouts easy to understand
Valves control or redirect water. A valve may isolate a skimmer, drain, feature, heater, cleaner, or return group. When valves sit close together without labels, troubleshooting can become slow and uncertain.
Ask for a valve schedule or a simple diagram. Each label should identify the line it controls, not merely use a number that only the installer understands. Photograph the valve arrangement with labels visible. If operating positions matter, request written instructions.
Valve access checklist
- Can you reach each valve without moving stored items?
- Can a technician operate it without stepping into landscaping or standing water?
- Are labels durable, readable, and matched to the plumbing drawing?
- Can one component receive service without shutting down every function?
- Will future decking, fencing, or planting block access?
Cleanouts give professionals accessible points to inspect or clear a line. Their usefulness depends on location and access. Ask where the plan places them, what line each serves, and whether finished surfaces will cover them.
Do not assume every plumbing issue can be solved through a cleanout. A licensed professional may need specialized testing or equipment. The value of a cleanout comes from providing a known access point when the design supports it.
Coordinate equipment placement with underground lines
The equipment area usually includes the pump, filter, heater, sanitation equipment, valves, and controls. Its location affects pipe distances, noise, drainage, weather exposure, and service access.
A good pool plumbing layout planning guide connects the pad plan to the pool plan. Review the path from each pool connection to the equipment. Sudden changes in direction, crowded fittings, or inaccessible valves may make future work harder.
Ask the pool professional to explain:
- How suction and return lines enter the equipment area.
- Where equipment isolation valves will sit.
- How water will drain during filter or pump service.
- Whether the pad can remain accessible after landscaping.
- How the layout accommodates the specified equipment.
- Whether a future replacement can reach the pad and connect without major demolition.
Equipment efficiency also depends on the selected pump and operating plan. The ENERGY STAR pool pump resource provides general information about certified pumps and energy-performance considerations. It does not replace project-specific sizing or professional design.
Drainage deserves separate attention. Water released during maintenance should not undermine the pad, flow toward the house, cross a septic area, or create a nuisance for nearby property. Site grading and local conditions require review by the appropriate professionals.
Use records to support future troubleshooting
Once crews hide plumbing, records become part of the system. Keep the final plumbing drawing, equipment schedule, valve map, pressure-test documentation if provided, product manuals, photographs, and approved changes.
For a broader review before covering work, see how to review pool plumbing before it is covered. That article addresses documentation questions without replacing an inspection by a qualified professional.
Build a Pool in North Carolina recommends keeping a simple service map with the following information:
- Pool-side location of skimmers, drains, returns, and specialty outlets.
- Equipment-side location of valves and connections.
- Pipe routes shown against fixed landmarks where possible.
- Photographs taken before backfill, decking, and landscaping.
- Notes about normal valve positions and operating modes.
- Dates and descriptions of later repairs or modifications.
A record cannot guarantee that a line will prove easy to repair. It can reduce guesswork and help a future technician understand what the original design intended.
Questions to ask before approving the plumbing plan
Use this short list during a design meeting:
- Can you walk me through the complete water path?
- Which lines are independent, and which share equipment or valves?
- How will returns serve the pool’s shape, steps, benches, and features?
- Where are the suction points, and how do you identify them?
- Where can a technician access valves and cleanouts?
- What will you photograph before the plumbing gets covered?
- Which drawing will show the final installed routing?
- How will drainage work around the equipment area?
- What changes require an updated plan or written approval?
Compare the answers with the latest documents. If the drawing, equipment schedule, and verbal explanation do not agree, pause and request clarification before work advances.
When to bring in a qualified specialist
Ask the local inspections department about permits, inspections, and currently adopted requirements. Use a licensed pool contractor for pool-system design and installation. Electrical connections should receive review and completion from a qualified electrician. Drainage, structural conditions, flood concerns, septic interfaces, or unusual excavation may require an engineer, surveyor, or septic professional.
A thoughtful pool plumbing layout planning guide gives you better questions and better records. It does not replace site-specific design, code review, testing, or professional judgment.
Comments are closed